How Many People Will Attend a Destination Wedding?

A few months before we ordered our invitations we finalized our invite list. Initially you might think this would be a quick task since we were hoping to only have 75 people. But think again! It wasn’t at all.

We really had to pare down and limit the invites. This was fine with me and my groom since we really wanted a small, intimate wedding but the parents were a little tricky. Each of the parents had different ideas about who had to be invited. My parents are divorced and have small families on each side, while Mr. P’s parents are married and come from large families. Our unequal family size complicated things because it had to be “fair” in terms of number of invites, but it also had to be fair in the degree of the relationship. My parents couldn’t be inviting their co-workers while Mr. P’s family weren’t able to invite his aunts!

Basically, after Mr. P and I decided on our must-have people, we asked our parents who was on theirs. First I asked my mom. She was super easy and understanding saying whoever I wanted was fine with her. Phew! What a relief. My dad wanted to invite all of his friends was so sweet because he was so excited. But I had to explain that the venue could only seat 100 people, but really we only wanted 75. So he had to select only the most important. To that he replied “they all are important!” My in-laws really wanted to include all of Mr. Pashmina’s family and all of their extended network of acquaintances, but from the beginning we knew to be ready for this. So we had to explain that only immediate family members would be invited (meaning no second cousins and beyond) but if they really wanted someone outside that then let us know. We calculated that each set of our parents could invite up to six of their closest friends. Mr. P’s parents are constantly going out with about twenty people, alternating parties at each others houses. Initially they felt it would be rude only to invite a few of them but there was no way that 20 of their friends were going to make the list for our small wedding, so we had to stick firm. All of these guidelines made our parents happy enough. My mom invited her best friend (who was already on my list), my dad went over his six friends, while Mr. P’s parent ended up only inviting 4 people from their group–the two closest couples. Then they gave me all their addresses and I added them to my running Google Doc list.

The only thing left to do was decide on something I had been putting off. My co-workers, would I invite them or not? It is a cross-country wedding, should I not invite them because it is so far? Would it make them feel pressured to go and use their precious vacation time? Should I invite them because it would be very unlikely that any of them would actually go, but it would be nice ask to them? I finally decided that yes I should ask to be nice. But then should I invite only the people I hang out with outside of work? Or should it be democratic and invite everyone from the office–about 30? Or only people in my department? After lots of deliberation I decided to invite everyone in my department–close to me or not–and then the people that I hang out with outside of work. This felt right to me.

So how many people in all did we invite for our 75 person wedding? 138! They say that about 85% of the people you invite will attend. But this figure goes dramatically down if you are inviting people from out-of-town or if it is a destination wedding. About.com uses this calculation to estimate your actual attendance: (# of out of town guests * 65%) + (# of local guests * 90%) = total # estimated to attend. I figured that since we were in the middle of a recession, that the people we were inviting were spread out all over the country, and that it was a destination wedding on an island that we were not going to have a very high acceptance list. Hopefully enough people would be able to come to fill our 75 person payment to the venue! But we were doing what all the wedding websites say not to do: don’t invite more people than you can actually have!

So we crossed our fingers and hoped that the perfect number of people would come. Not too many that there wouldn’t be space, and not to few so we would be paying for unused meals!

How did you decide on your guest list? Was it tough? How many people did you invite compared to who actually attended?

How to Get Mailing Addresses from Friends and Family in the Digital Age

Back when I was doing my Save the Dates I used Google Doc’s to get addresses from the people on my guest list. I used the “Form” feature to set this up. Here is how you do it:

You go to Google Docs (docs.google.com), sign in to your Gmail account, go to “Create New”, and select Form. Then type up questions you would like to be answered using their template. You can get fancy by selecting a theme. I chose a marine theme with red and blue fishes. Next you add the emails addresses of who you would like the form to be sent to. The questions are embedded into an email that is really easy to fill out.

I asked only very, very basic information. Actually three questions to be exact: 1.) Name, 2.) Current Address, and 3.) Phone Number. The best part about it is that when people fill out the form, Google automatically translates their answers into a spreadsheet. It is super cool and easy!

Image from digitallydiscontent.com

I used their answers as my initial guest list. I modified their responses to include everyone in the household, some people included their children and wives but not all of them.

I color coded any of thing that needed attention–like to check their latest girlfriend’s name or the crazy spelling of their children on Facebook. Surprisingly I Facebook-stalked quite a bit and it was really the easiest and fastest way to get this info! You’d be surprised at how long an email question can be answered by Facebooking them.

Once I had our invite list up-to-date I had to add the parents contacts. This would be a completely different task, with its own set of challenges…but more on this later.

How did you get and organize your guest list addresses? Were you surprised that you didn’t know your closest friends and family members’ mailing address?

Our Wedding Invitations

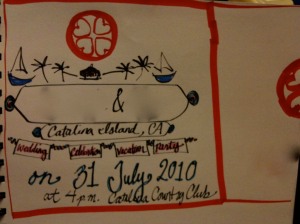
Take a look at our Catalina Island-inspired wedding invitations!

This was one of the funnest projects of the wedding simply because it was in collaboration with one of my besties. But, really, who knew paper could be this creative and fun! This is how our invites came to be:

After sending out a huge lot of inspirations files to Alana Bailey Brand, I let her do her magic! She translated our wish for a whimsical and destination-themed invite into something prettier than I could have imagined.

The central design is based off of a wine bottle that I found with my mom on a trip to Sendona, Arizona. We were rummaging a wine market trying to find a special bottle for her birthday and it was there waiting for us. It was just days after we officially decided to have the wedding in Avalon so I thought it was fate! The wine company is called Avalon and had the most romantic little heart logo that reminded me of the famous Catalina Island’s tiles all over the island and at our venue. I’m not sure if the wine has anything to do with the town of Avalon or what the logo is supposed to be, but the image stayed with me and it sort of became the logo of our wedding in mind instantaneously.

Alana loved the idea too and transformed the simple heart design to a scrolling, wedding worthy vision with our initials monogramming the front. After a little back and forth about colors we finally found the hues that were on point with our wedding theme of peaches, pinks, corals and gold.

You can see the first three proofs where we are playing around with color. The next proof has different versions of our initials. Mr. P decided on which initials we would go with (you have to give your hubby decisions to make them feel involved…haha!) The last proof is with our wedding palette.

Next, were the map of Avalon and RSVP cards to do. My only direction for the Map was that I wanted it to have the major streets on the island, to make sure it incorporated where we were staying because it was in a remote location, to have a few hotels listed as accommodation ideas, and for it to include a few of the major tourist spots. I love the maps by Laura Hopper, and she was the inspiration for ours. She has very loose calligraphy and fun icons that are so sweet and adorable. Alana totally captured the feeling with her design. And the coolest thing for me: Alana took my very own drawings of the Country Club, Casino, Wrigley Botanical Garden and added them directly onto her map. So I literally helped make it! It was a really sweet gesture since I had been having so much fun art-ing and drafting up ideas!

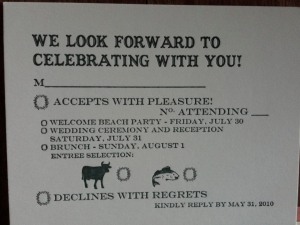
The map felt so effortless to decide on, but that wasn’t the case for the RSVP cards. It was tough to figure out how to include everything we needed to on one card. We were trying to use it to capture the names and number of people that were attending the wedding as well as their food selection. We also were asking if the guests would be attending our rehearsal dinner (a.k.a beach party) and the day after brunch. That is a lot on a small card! In the end I think it was a little confusing, although no one mentioned anything to me.  This is why: The cards were to cover an entire family but we had a check mark next to the food selection–instead of a blank spot for people to fill in the quantities of their entree selections. So how do they indicate who wants what when there are multiple people involved? The other thing was that the entree selection was underneath the Brunch option (it just had to be there because of space) so it seemed as if we were asking about that menu selection. But it all worked out! The RSVP cards worked enough because people made their food selection tableside so it didn’t really matter. I just needed to give the venue a rough estimate. And since it was a destination wedding, we sorta knew who was on the island during which dates and so who would be around for brunch. Live and learn! RSVP cards have to be really, really well planned out!! We should have done a trial run.

Alana suggested letterpress to execute the invites and had a printer in mind she wanted to work with called Dexterity Press. I was thrilled about the idea of letterpress and couldn’t believe it would be for my invites! I ordered the paper and envelopes from Papersource.com, and shipped it straight to the printer and we were ready to go! While I was waiting for the invites I got my stamps ready–I bought all the ones that were island themed, meaning Kelp & Dolphins.

image from Avalon Winery

One note: we decided that the design was perfect for a square shaped invitation, but I didn’t realize how much more it would cost (although I was warned that it would be more expensive). The size of the square is not actually the square option on the post office’s website, but it is a little bigger and because of it actually fits in to the large envelope category–making it much more than I calculated.

Catalina Island tile at our venue, image from spookshows.com

Then just a few short months later (which felt like eternity), a package came in the mail all bubble wrapped and beautiful. Even the packaging was inventive and customized (our initials printed on leftover paper)! I loved them. They were much more delicate then I imaged. I hadn’t seen many letterpress invitations and they were much more pressed than I thought they would be–I mean major indents!

So this project was part professional and part DIY. My end didn’t go so great. There were two things that I didn’t anticipate, both were related to how much my personal printer is pretty much useless. I thought I would run my outer envelopes through the printer instead of doing hand calligraphy. I spent hours organizing my invite list and making them spaced appropriately for this. I even bought a special font called Nelly on MyFonts that matched the whimsical calligraphy of the innards. This all proved useless because of my printer. The envelopes wouldn’t print correctly no matter how much I played with the setting! I was going to hand address all of them–EEK! I freaked out, yelled at my hubby-to-be (because he wasn’t helping at all) and tried to address 120 invitations in one night. I failed, and wasted way too many envelopes because I was doing it too tired.

The second thing I wasn’t expecting related to my printer (really it was my computer) was creating labels. In the same night I was trying to address all these invitations I was trying to print on the labels I bought from Papersource. These were going to go on the reply envelopes. It was the first time I tried to use Mac’s TextEdit program for labels and I couldn’t figure it without giving it more attention than I wanted to give. So I went down to the Kinkos in my neighborhood and used Microsoft Word to complete the project in less than 2 minutes. I should have gone there earlier and saved myself the headache.

Invitation, RSVP card, Map, Stamps
Close up of the map
Invite wording
Stacked and ready to collate
The trio
Map stacked first so first thing people see
Wedding helper
@ Kinkos printing labelsReply envelopes, labels printed!
Ready to be sealed!


What was your process of creating invitations? Did you make them yourself? Collaborate? Or order from a template? Did you run into any glitches? Did they turn out better than you expected?

Did you miss our Vintage Travel Save the Dates by Alana Bailey Brand? Check them out here.
*all images personal photos. Designed by Alana Bailey Brand. Letterpress by Dexterity Press.

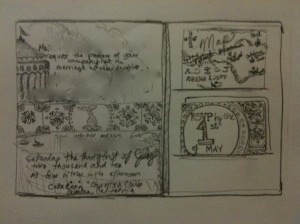
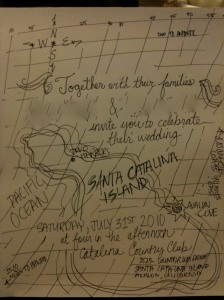
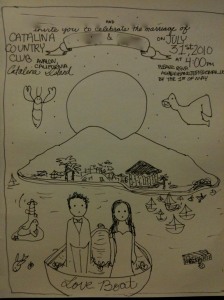
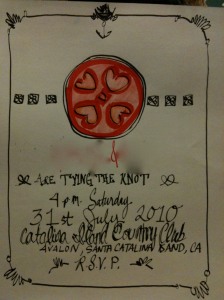
Drawing Up Catalina Island Invitation Ideas

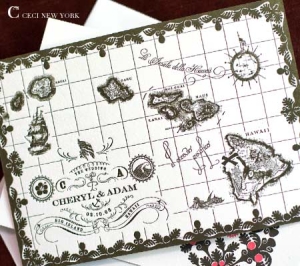
My #1 Invite. Image from Ceci New York.

One of my favorite parts of wedding planning has been looking at invitations online and in-person. I love, love, love invitations! You can go so many different ways and instantly give the opener an idea of what your wedding will be like. After coming across an article in Real Simple Magazine titled, “What is Your Invitation Style,” I decided to show Mr. Pashmina the pictures of the invites (without telling him what style was which) to see what he would like our style to be. According to the magazine there are four different styles: formal (traditional/sophisticated), semi-formal (modern/classic), thematic (reflecting a location or activity), and whimsical (quirky/creative). He couldn’t decided between two: thematic and whimsical. His reasoning for the two he chose: because they looked “fun” and “we are fun people” (yep, that is my man!). For thematic invitations we brainstormed that it could be island themed with palm trees, maps and charts; or nautical with ropes and anchors; cross-country themed with New York to California emblems. For whimsical ideas we mostly talked about how we could mix fonts and use something like the loose, curly one in the picture.

Mr. P's #1 Invite (on right.) Image from RIFLE.

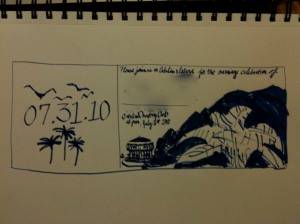
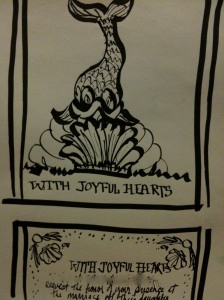
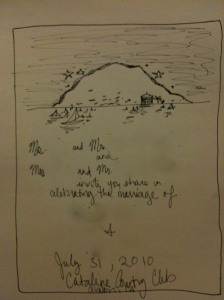
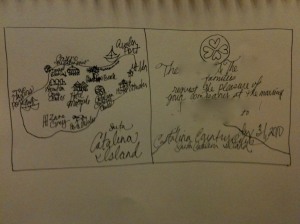
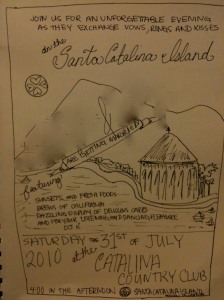
I was super lucky and knew from the get-go that my friend, and bridesmaid, would be able to help me create custom invites so I was pretty much free to come up with whatever I could imagine (how cool is this, right?!). Over the next few months whenever I came across an invitation I liked on the internet I added it to my folder titled “Invitation Ideas.” Then the time came to narrow down my favorites! I pretty much was in love with two companies that made invitations Rifle and Ceci New York (especially their Destination line). They were whimsical and thematic–perfect. I thought the best way to decide on our invitations was to draw a rough outline using these sites as inspiration but use our wording, our names, and our Catalina-inspired elements! Then we would really be able to imagine them, then we could send these to my friend and she could work something up with these things in mind.

Here are a few of the ideas I came up with (I’ve blocked out personal info for privacy):

How did you decide on your invitations? Did you have a fun time researching and coming up with ideas like I did?

My Vintage Travel Save the Dates

My beautiful bridesmaid and owner/operator of Alana Bailey Brand created my awesome save the dates! I just love them!

My 1930s Inspired Save the Date with URL blocked out. Created by Alana Bailey Brand.

After telling Alana of an inspiring vintage wooden sign I saw on the Internet, I emailed her a picture of it. She loved it too and then proceeded to work her magic translating the vintage image into a postcard! Or shall I say, our wedding save the date!

The original image is from 1930s timetable (this is from my detective work based on a similar image with this history). It has a big sun setting its abstract orange rays behind the silhouette of a cerulean Catalina Island. With Alana’s magic as a printmaker she translated this image into the 21st century without losing an ounce of its glory!

Personal Photo.

She added the date of our wedding into the sun, and put our wedding website URL (which is blocked out of the image above for our privacy) so people could go directly to our website for details about the wedding. We didn’t add any of the conventional words like “save the date” or even our names. A while ago I blogged about this–not being sure about if people will miss this wording–on “No ‘Save the Date’ on Your Save the Date?”. No one was confused about what 7.31.2010 stood for–which was a major concern. But a few people didn’t realize that the http://www.x.com was to go to a website. But these people aren’t technical people so it is a bit understandable.

Personal Photo.

We ordered the paper in Cream Lux from papersource.com and used ‘night’ blue colored envelopes.

The envelopes had even more details. Alana put a block of white as a place for us to address them. I used a navy blue ink pen to do this. She also added our return address on back in white text — it was even in the same style script as the “Catalina Island” words on the face of the card. Then she added glittering little waves on the inside of the envelopes for some pizzazz!

The Magnets. Personal Photo.

The finishing touches were when I attached two magnetic strips, cut to fit the two shortest sides of the card so people could hang up the invites on their fridge when they got them.

There you have it! My vintage-inspired wedding save the dates! A little bit homemade/a little bit from the professional. I had a blast collaborating with Alana–she is the best!

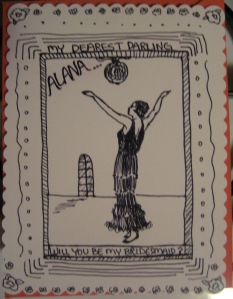
How Did You Invite Your Bridesmaids?

I planned to send each bridesmaid a cute “Will You Be My Bridesmaid Card”. However, my grandmother got critically ill in May and I forgot my “plan” while out to dinner with my bridesmaid visiting from Chicago. At Rosa Mexicana, a hip NYC restaurant we went to because as Southern California girls we always miss Mexican food, I asked her in a stumbling manner if she would be my bridesmaid. When we got back from dinner the two of us were talking about wedding stuff and even my fiance was like, “You asked her already?” surprised that I didn’t stick with my plan. Well as a best friend and former roommate, she understood. But a few months later I got back on board with what I was planning, organized my thoughts and translated them into little mementos.

Here are a few pictures of how my other two “Will You Be My Bridesmaid” cards turned out:

Calligraphy – A Script Beginner

My handwriting has gotten worse over the years. Can that actually happen? Shouldn’t it improve as I age–I mean I have done it more and more! Well, no matter what it is my script has not aged well. Getting ready to send out my save the dates I bought a box of calligraphy pens. I didn’t end up using them because I had to use a very specific navy color –which wasn’t fox in the box. I am getting ready to begin thinking about my wedding invites. Looking around the internet I ran into this article on Project Wedding that gives you simple tips to begin writing calligraphy.

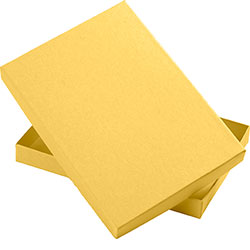
A7 Wedding Invitation Box

A few weeks back I posted about my hunt for boxes for A7-sized invitations.

Recently I found wedding boxes specifically made to enclose A7 wedding invitations at Papersource. A few colors are on sale for $1.60, regularly $2.00. And a few colors can be bought in bulk–packs of five for $9.50. Papersource has beautiful colors but these are on the pricier side. With my guest list I am looking at least 50 boxes making it about $100. I am hoping to find a more budget friendly options–something that could be bought in bulk. The only problem is that the general box websites do not have the perfect A7 size (7 3/8″ x 5 3/8″ x 3/4″). Perhaps I should lean towards a slightly smaller invite–even though less traditional–to save more than half on the boxes. Just a thought!

Please let me know, Boho Brides, if you run into any boxes that would “fit”!

D.I.Y. Letterpress Invitations

Yes, you heard that right — do-it-yourself letterpress invitations.

If you are a budget bride you may think your only options are thermography or printing your invitations using your computer’s inkjet printer. A new tool on the market is called L Letterpress Kit. This home craft tool makes impressions onto paper that traditionally must be done using an industrial size machine. After reading a bit about the L Letterpress Kit on Papercrave and DIY Bride, the reviews are mixed. The negatives mainly are that you can’t customize your work easily–you must use preset letters and designs– and that it takes practice to use. Well, starting in the next few months L Letterpress will offer the option for you to upload your custom design to create a custom plate. And, well, practice makes perfect with everything.

Why not use this machine to make those coveted letterpress relief wedding invitations for a fraction of the cost ($150 for the machine and with an A.C. Moore or Michael’s 50% off coupon only $75). If you are looking for a project to do at home, this might just be a good one. Similar letterpress invitations go for $500 for 50. And on my budget this option is completely unrealistic. Of course you would need to purchase the Everyday ($25) and/or the Wedding Printing Plates ($25) to complete your product as well as paper and envelopes ($30) upping the cost slightly.

If you like the look of letterpress but this is still to pricey–or unpredictable–get an embosser ($60) to put your monogram on your inkjet printer invitations.  Then continuing on to use your monogram on your other paper goods: favor tags, escort cards, etc.