Today I am in the Sky! Marriage Bound

(I wrote this post on July 27th–the night before I was going to leave for the wedding. I thought I was going to post it to the hive the day I left. But with so much to do I guess I forgot to do that part! Anyways I thought you might like to read how frazzled I was!!! So here it is….)

I am a mess you Bees! My apartment is a disaster. I already left one of my bridesmaid gowns at work (it was delivered there by the tailor but I forgot to bring it home. Thankfully my co-worker was thinking and called me). But by the time you read this I am going to be up in the sky somewhere between New Jersey and California. It is 10 p.m. the night before we leave. At this moment my fiance is doing laundry, I am printing out the Menu cards, and I am freaking out about leaving my cat for twelve whole days. I didn’t think there were so many things still to do last minute but then this month totally snuck by me. July has been crazy!
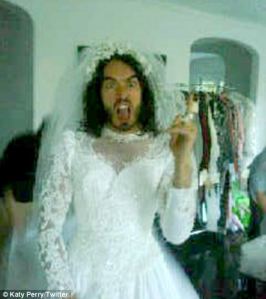
Image from US Weekly

Fourth of July weekend, then the Bachelorette Party in Vegas the next weekend, then The Bridal Shower the weekend after (more on this later). And then it was THIS weekend. Wedding weekend! Boom, boom, boom. Who knew I was gonna be so busy.

Saturday is the big day! And I am going to leave the comfort of my own home where there is crafting supplies, my computer files, my temperpedic bed. Just a few more hours till we leave. Can I complete all the things that MUST get done? Will I sleep tonight. OMG! I feel like that how Russell Brand looked in that photo that Katy Perry Tweeted. I think the caption was “Bridezilla much?”

So wish us luck these next hours!

Birdcage

Image from Martha Stewart Magazine

My mom volunteered to be in charge of the birdcage that we will have at our wedding. You may be wondering why we will have a bridcage at our wedding. Will we have birds or something? Well, no, not exactly.

I have learned through wedding planning that birdcages are symbolic. They once held white doves that the bride and groom release during the ceremony. Now, ever since Victorian times, birdcages are heavily decorated and simply symbolic of a wedding–and prosperity. Perhaps this is why the decorated birdcages often double as a card or money box. I am not quite sure if our will be a card box or will simply act as decoration at the entry way table near the guest book.

This is the picture I showed my mom as inspiration for what I hope our birdcage will look like. Isn’t it amazing! I love it.

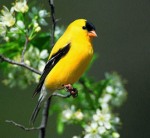
While out at the Brooklyn Botanical Garden last weekend we picked up a number of little birds to go inside the cage from the gift shop. The birds are all really adorable especially the little goldfinch. The birds are microscopic adding to their cuteness. I can’t wait to see how my mom’s interpretation of this turns out!

Image from the NAE

Martha Stewart Floral Fans

I really wanted to buy fans for our wedding guests so they could cool themselves down in the potential HOT July heat. First I considered the traditional Chinese fans, then thought about the traditional palm fans from the Philippines, and then latched on to that idea. Last February we went to the Philippines and I saw that the fans are everywhere and often with embroidered text so I thought that would be an awesome idea on how to personalize them. I tried and tried with all might to get some of the people who visited the PI (Philippines for short) to bring some back since they would be cheap straight from the source, but no one could or had the space/time to.

Then I remembered the great Martha Stewart Floral Fan template I saw a few months back. I was always drawn to it because it was a dusty coral color–just like our wedding–and very whimsical. So I decided to go with this idea. It would potentially save me upwards of $100 dollars so I was especially keen on the idea.

So here is how it went:

Day 1

Step 1: I purchased 110lb Ivory paper from Staples for $15
Step 2: I printed out the template and printed 100, 2 pages (front and back) which equaled 200 sheets from the 250 ream.
Step 3: I decided to add our names and the date in the empty space. I tried to download whimsical fonts from free sites but couldn’t find exactly what I wanted so I bought the Nelly Flourish script from DaFont for $39.00. It took a few trials by my fiance and I finally decided on the spacing and what it should say–initials or names, date or no date?

Day 2
Step 4: I played around with the colors on my Mac’s text edit. I Googled to see what RGB color would be a dusty peachy pink. I ultimately went with “Coral” and changed the RGB to 255: 64: 64.
Step 5: I tested out the font and fooled around with the placement on the template–which took a few tries. Then reran all 200 of the paper templates through the printer so the personalized text would print on the front side.

Day 3

Step 6: I began to cut out the templates. If you will be attempting this or something similar I have a HUGE tip–which I didn’t realize until 99% of them were done. Get one of each paper–front and back–and put them so they are facing you (both sides) just as they will be when used. THEN cut them out. I did them individually so every little curve that is different became a little problem because it didn’t match exactly! Even with my steadiest hand. After cutting all these out I must say I was SUPER delirious with an achey hand.

Day 4:

Step 7: I bought a mini-glue gun (which had to be exchanged for a large standard one because the glue didn’t come out fast enough before it hardened), wooden sticks, and a pack of extra glue.
Step 8: Assemble! Lay the back of the fan out with text facing the table. Then I set up a system with my measuring tape–measuring 3 1/2″ from the edge and 4″ up from the bottom. Put your finger there, then put glue on the wooden stick and smooth. There should be a little handle perfectly straight with the tip of the fan. Then I put glue all around the edge as quickly as possible. Then put the front of the fan with the text facing you on top of it. Smooth so the glue is spread out evenly.


Phew there you have it!! My first big project for the ceremony done! What do you think, Boho Brides? Have you begun your first project. Did it go as expected. I am pretty happy with mine!

Napkins — Rent, Buy or Make?

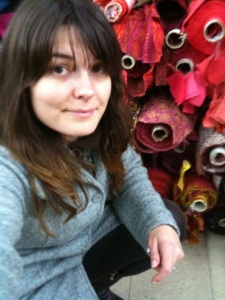
Row after row of fabric at Elegant Fabrics NYC

After receiving the quote from Wildflower Linen, I decided that I should explore other options besides renting. Either buying cheap napkins or making them.

If I bought, I would look for napkins from one of the discount stores like Kohls or Overstock.com on sale–I’m thinking like 70% off! I have been searching on the internet and it has been crazy difficult to find the color napkins I want. So I think I may just need to stumble upon them. I am hoping for a dusty peach or rose color, and something with natural fibers and textures. Has anyone seen anything? Pottery Barn would be my style…but not the price range!

Everyday I walk past a little gem of a shop–it is called Elegant Fabrics. Heard of it? Yep, it is the place Project Runway went for oh so many seasons. I love their selection of fabrics. It is unworldly! If you are used to JoAnn’s or Walmart you will be gasping for air when you find this place. There are no quilting calico prints anywhere!

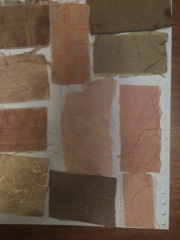
Fabric Swatches

So after work last week I cruised around Elegant Fabric so I could find that perfect material. It couldn’t be too thin, or too shiny. It needed to be soft enough to wipe your mouth.

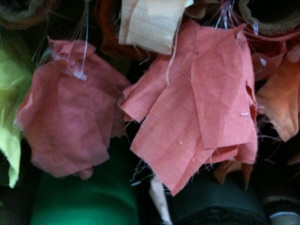
One of the best things about going to a fabric store in the middle of Fashion District in New York City is that they have swatches ready for you. They are used to fashion and design students asking them for swatches so they are ahead of the game. They have them pre-swatched and hanging from the fabric bolt so you can help yourself and leave the clerks alone!

The Selections
My favorite -- Raw Silk @ $14.95 per yard

It took me awhile to find exactly what I wanted but this is basically it: I like raw silk or duponi, either in golds, pinks and peach neutrals, and soft colors with a pop of coral color.

I wasn’t even considering any fabrics over $19.95–but was really aiming for half this–which wasn’t realistic here. Unfortunately half the fabrics in there were $19.95-$24.95. So that eliminated a few at the get-go.

On the way home I looked at tutorials on how to make dinner napkins. They say I would need about 1 yard of fabric for every 4 dinner napkins. Since all the fabric at Elegant is 60″ not the more common 45″ I could get away with a little less yardage.

But would this be cost effective at $19.95 a yard? Not really!! But I could always keep the napkins for later…? Would it be worth the trouble of cutting it into square, and perhaps hemming four sides of 75 napkins?

So Sweet DIY Bridesmaid Cards

These are the most adorable “Will You Be My Bridesmaid?” Cards. I recently completed my very own paper project (more on that later) and these served as one of my sources of inspiration. So I thought I would share them with you! They are just too fun ‘n sweet to keep to myself. By the way, Once Wed has recently been putting out a lot of posts with step-by-step instructions on how to do some wonderful things. I love personalized things. And crafts projects! Try them out or make something your own!

Image from Once Wed.