M&J Trimming


I love living in New York City. This place is amazing! I just hit the landmine with this one: M&J Trimming is the mecca for ribbons. There are so many types of trimmings it is mind boggling. There are thousands of ribbons lining the mile high walls. Do you need ribbon for trim? Sparkling rhinestones? Buttons? Feather boas? This is the place. They even have a bridal section with veils, lace, and broaches.

When I first moved to the city I passed by this place when it was closed. If it had been open I think I would have been there a lot more often over the last five years. Good thing for my budget, bad thing for my arts & crafts. 😉

So remember those floral fans I made a little while back? Now, with only two months left till the wedding, it is time to add the finishing touch. Little ribbon bows!

At M&J the had a lot to choose from. At first I tried to focus on the color. I was looking for light pinks, creams, peaches, papayas. But really there were so many I needed to decide on the fabric. At first I didn’t think I wanted shiny, so I dismissed all the satin, silks, and organza. But then I changed my mind because I didn’t want my ribbon to look too crafty. You know, like childlike. And for some reason the matte ribbons started to make me feel like that. So no grosgrain, floral patterns, or polka dots.

An M&J the minimum to buy is 1 yard.  So since I didn’t have a strong love of one ribbon over another I decided to take a few of my favorites.

Take a peak at a few of my favorite contenders. I am not quite sure if I need to make another trip now that I am beginning to get a feel of what I do and don’t like.

Boho Brides, which do you like best?

Rustic Boho

Image from Style Me Pretty.


I love this rustic bohemian-theme photo shoot from Style Me Pretty. It is inspired from a wedding palette of soft browns, wheat, pinks and greens. I totally adore subtleties that make it a little bit Western (it is inspired by Austin, after all) such as the fringed scarf and cotton plants. The feel is not overly Southwestern or overly down-home-country. No cacti or comfort food. The result is an elegant wedding that is vintage, romantic, and earthy!

As I begin trying to think more about my own table scape I am struck by the font on the burlap sacks and the added doilies to the table numbers. It all feels very Parisian in Texas! J’adore, Cowgirls! LOL.

Image from Style Me Pretty.

That gets me wondering, Boho Brides. Are there two themes that you want to incorporate for your wedding? Perhaps they are from the get-go opposite styles?

Way back when I was trying to identify my theme I was tossing around the idea of a retro vibe of Polynesian and Parisian. Think of the Hawaiian restaurant Roy mixed with the Las Vegas’s Paris hotel buffet: Rib eye steaks with teriyaki sauce (my favorite combo), crab legs, Nicoise salad, macadamia nut cupcakes (imagine with a pink orchid) and bananas foster. That one didn’t take, a little too customized–right!

Martha Stewart Floral Fans

I really wanted to buy fans for our wedding guests so they could cool themselves down in the potential HOT July heat. First I considered the traditional Chinese fans, then thought about the traditional palm fans from the Philippines, and then latched on to that idea. Last February we went to the Philippines and I saw that the fans are everywhere and often with embroidered text so I thought that would be an awesome idea on how to personalize them. I tried and tried with all might to get some of the people who visited the PI (Philippines for short) to bring some back since they would be cheap straight from the source, but no one could or had the space/time to.

Then I remembered the great Martha Stewart Floral Fan template I saw a few months back. I was always drawn to it because it was a dusty coral color–just like our wedding–and very whimsical. So I decided to go with this idea. It would potentially save me upwards of $100 dollars so I was especially keen on the idea.

So here is how it went:

Day 1

Step 1: I purchased 110lb Ivory paper from Staples for $15
Step 2: I printed out the template and printed 100, 2 pages (front and back) which equaled 200 sheets from the 250 ream.
Step 3: I decided to add our names and the date in the empty space. I tried to download whimsical fonts from free sites but couldn’t find exactly what I wanted so I bought the Nelly Flourish script from DaFont for $39.00. It took a few trials by my fiance and I finally decided on the spacing and what it should say–initials or names, date or no date?

Day 2
Step 4: I played around with the colors on my Mac’s text edit. I Googled to see what RGB color would be a dusty peachy pink. I ultimately went with “Coral” and changed the RGB to 255: 64: 64.
Step 5: I tested out the font and fooled around with the placement on the template–which took a few tries. Then reran all 200 of the paper templates through the printer so the personalized text would print on the front side.

Day 3

Step 6: I began to cut out the templates. If you will be attempting this or something similar I have a HUGE tip–which I didn’t realize until 99% of them were done. Get one of each paper–front and back–and put them so they are facing you (both sides) just as they will be when used. THEN cut them out. I did them individually so every little curve that is different became a little problem because it didn’t match exactly! Even with my steadiest hand. After cutting all these out I must say I was SUPER delirious with an achey hand.

Day 4:

Step 7: I bought a mini-glue gun (which had to be exchanged for a large standard one because the glue didn’t come out fast enough before it hardened), wooden sticks, and a pack of extra glue.
Step 8: Assemble! Lay the back of the fan out with text facing the table. Then I set up a system with my measuring tape–measuring 3 1/2″ from the edge and 4″ up from the bottom. Put your finger there, then put glue on the wooden stick and smooth. There should be a little handle perfectly straight with the tip of the fan. Then I put glue all around the edge as quickly as possible. Then put the front of the fan with the text facing you on top of it. Smooth so the glue is spread out evenly.


Phew there you have it!! My first big project for the ceremony done! What do you think, Boho Brides? Have you begun your first project. Did it go as expected. I am pretty happy with mine!

What Else Besides the Flower Girl Basket?

Image from Brides

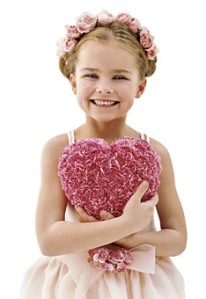
My venue does not allow petals to be thrown by the flower girls. Say what!? Yep, that is right. So what in the world will our little flower girls be doing in our wedding–besides looking adorable–if they will not be holding a basket?

I need help.

What would make them look like flower girls if they are not dusting the aisle with flowers?

Image from Brides
Image from Brides.

I set out on a search and came across this wonderful article on Brides magazine all girls without a flower basket and still looking very much like a flower girl!

Are there any other brides out there that aren’t allowed to throw petals? How have you gotten around venue restrictions? What will your flower girls be doing?

My Vintage Travel Save the Dates

My beautiful bridesmaid and owner/operator of Alana Bailey Brand created my awesome save the dates! I just love them!

My 1930s Inspired Save the Date with URL blocked out. Created by Alana Bailey Brand.

After telling Alana of an inspiring vintage wooden sign I saw on the Internet, I emailed her a picture of it. She loved it too and then proceeded to work her magic translating the vintage image into a postcard! Or shall I say, our wedding save the date!

The original image is from 1930s timetable (this is from my detective work based on a similar image with this history). It has a big sun setting its abstract orange rays behind the silhouette of a cerulean Catalina Island. With Alana’s magic as a printmaker she translated this image into the 21st century without losing an ounce of its glory!

Personal Photo.

She added the date of our wedding into the sun, and put our wedding website URL (which is blocked out of the image above for our privacy) so people could go directly to our website for details about the wedding. We didn’t add any of the conventional words like “save the date” or even our names. A while ago I blogged about this–not being sure about if people will miss this wording–on “No ‘Save the Date’ on Your Save the Date?”. No one was confused about what 7.31.2010 stood for–which was a major concern. But a few people didn’t realize that the http://www.x.com was to go to a website. But these people aren’t technical people so it is a bit understandable.

Personal Photo.

We ordered the paper in Cream Lux from papersource.com and used ‘night’ blue colored envelopes.

The envelopes had even more details. Alana put a block of white as a place for us to address them. I used a navy blue ink pen to do this. She also added our return address on back in white text — it was even in the same style script as the “Catalina Island” words on the face of the card. Then she added glittering little waves on the inside of the envelopes for some pizzazz!

The Magnets. Personal Photo.

The finishing touches were when I attached two magnetic strips, cut to fit the two shortest sides of the card so people could hang up the invites on their fridge when they got them.

There you have it! My vintage-inspired wedding save the dates! A little bit homemade/a little bit from the professional. I had a blast collaborating with Alana–she is the best!

How Big Is Your Wedding Party?

Mr. Cali Girl and I decided on our wedding party pretty easily. With somewhat disregard for the traditional number of attendants we should have.

Image from Katee's Wedding.

So, yeah, it was pretty easy deciding on who. My advice is to stick with your instincts.

I wanted to represent each stage of my life–from little kid to high school to college to present. My sister is my “Maid of Honor” and represents the little me, while my other bridesmaids represent high school college. I decided to have Mr. Cali Girl’s sister and nieces in the wedding, and they will represent the current stage of my life–my life in New Jersey! Mr. Cali Girl’s sister will be a bridesmaid but called “sister of the groom.” I just couldn’t make her another “Maid of Honor” thinking that would take away from my sister (and best friend). Mr. Cali Girl’s 3 nieces (my mini-BFFs!) are junior bridesmaids. While the other 2 nieces will be flower girls. And to top it off my nephew will be the ringbearer.

Mr. Cali Girl knew from the get-go that he wanted to include his longtime friends to be his groomsmen. He asked all six of them all the day he told them we were engaged. Only now (11 months later) he having second thoughts about not including some of his other family members in the wedding. Should he have instead included his half brother? Brother-in-law? My brother-in-law? I say keep with what his gut told him, but we will see if the wedding party grows!

But should we invite more groomsmen to equal out the girls?

So currently our count is 6 groomsmen, 1 ringbearer, 5 bridesmaids, 3 junior bridesmaids, 2 flowergirls. And a total of 17 in the wedding party and less than 100 guests. They say 2-4 attendants per 50 guests, and we have about three times this for a wedding roughly the same size!

I think I may need to invite more people! Hmm…

Aunties and Uncles and More…!

We are having an untraditional Filipino wedding. Untraditional in the sense that we are not having a huge 500 person wedding!! We are not inviting all the aunties and uncles (that are somehow related but I’m not quite sure how). I read some where that the tradition of a huge wedding is due to the legacy of the entire village celebrating the bride and groom’s union. This is a wonderful thing but in this economic recession–not feasible!

My fiance, who is the Filipino one, never wanted a large wedding. He didn’t really want it to be a huge ordeal. Just a natural evolution of our relationship. I didn’t even imagine this or think it was something to be considered because my family is so small. I think the largest party my family has ever thrown had about 40 people! My uncles and aunts are not married, and I have no cousins. I have never attended a marriage in my own family!

My fiance and I decided that 100 people would be our absolute max. Anything more we would be uncomfortable. Really we hope that the turn out would be more like 75. But 100 would be our cap. This was how we initially decided on our wedding size.

But the closer and closer the wedding gets the more I have to explain why Auntie X or Uncle Z isn’t invited. I say “We are only inviting immediate family.” Or I try to divert the blame, “It’s not up to me, Mr. Cali Girl is in charge of his guests. If he thinks we should invite them then I will add them to the guest list” But I hate this. I don’t want to burn any bridges, I don’t know the ties of all his family’s relationships. I wish I wouldn’t have to be faced with this.

I wish I could have just had that 500 person event in a huge hall so I wouldn’t have to deal with it. I am a softie! I love people. But in reality my venue only fits 120 (and this would be with no dance floor). So reality is we WILL have a small wedding. Well, a small one for his family and a LARGE one for mine!

How did you decide on your wedding guest list size? Economics? Family size? Comfort level?

Santa Barbara Vineyard Wedding

Image from Style Me Pretty

I love this wedding–not only because it is in my hometown, and not only because having a vineyard wedding was on my list.

Gainey Vineyard was an early contender for a wedding site, Joy de Vivre was who I was going to choose for a planner, and my SBBQ’s menu was already planned (really, there food looks amazing)!

I love the vibe of this wedding. It captures California beautifully. Oak trees in the distance and all!

Beautiful flowers! And what about those lanterns from Z Gallerie?! They are just too great. I am on the look out for lanterns so this adds an option to my growing list. Great job to all those who made the celebration a success!

Casablanca Lanterns from Z Gallerie, $8, $15
Image from Style Me Pretty