How Many People Will Attend a Destination Wedding?

A few months before we ordered our invitations we finalized our invite list. Initially you might think this would be a quick task since we were hoping to only have 75 people. But think again! It wasn’t at all.

We really had to pare down and limit the invites. This was fine with me and my groom since we really wanted a small, intimate wedding but the parents were a little tricky. Each of the parents had different ideas about who had to be invited. My parents are divorced and have small families on each side, while Mr. P’s parents are married and come from large families. Our unequal family size complicated things because it had to be “fair” in terms of number of invites, but it also had to be fair in the degree of the relationship. My parents couldn’t be inviting their co-workers while Mr. P’s family weren’t able to invite his aunts!

Basically, after Mr. P and I decided on our must-have people, we asked our parents who was on theirs. First I asked my mom. She was super easy and understanding saying whoever I wanted was fine with her. Phew! What a relief. My dad wanted to invite all of his friends was so sweet because he was so excited. But I had to explain that the venue could only seat 100 people, but really we only wanted 75. So he had to select only the most important. To that he replied “they all are important!” My in-laws really wanted to include all of Mr. Pashmina’s family and all of their extended network of acquaintances, but from the beginning we knew to be ready for this. So we had to explain that only immediate family members would be invited (meaning no second cousins and beyond) but if they really wanted someone outside that then let us know. We calculated that each set of our parents could invite up to six of their closest friends. Mr. P’s parents are constantly going out with about twenty people, alternating parties at each others houses. Initially they felt it would be rude only to invite a few of them but there was no way that 20 of their friends were going to make the list for our small wedding, so we had to stick firm. All of these guidelines made our parents happy enough. My mom invited her best friend (who was already on my list), my dad went over his six friends, while Mr. P’s parent ended up only inviting 4 people from their group–the two closest couples. Then they gave me all their addresses and I added them to my running Google Doc list.

The only thing left to do was decide on something I had been putting off. My co-workers, would I invite them or not? It is a cross-country wedding, should I not invite them because it is so far? Would it make them feel pressured to go and use their precious vacation time? Should I invite them because it would be very unlikely that any of them would actually go, but it would be nice ask to them? I finally decided that yes I should ask to be nice. But then should I invite only the people I hang out with outside of work? Or should it be democratic and invite everyone from the office–about 30? Or only people in my department? After lots of deliberation I decided to invite everyone in my department–close to me or not–and then the people that I hang out with outside of work. This felt right to me.

So how many people in all did we invite for our 75 person wedding? 138! They say that about 85% of the people you invite will attend. But this figure goes dramatically down if you are inviting people from out-of-town or if it is a destination wedding. About.com uses this calculation to estimate your actual attendance: (# of out of town guests * 65%) + (# of local guests * 90%) = total # estimated to attend. I figured that since we were in the middle of a recession, that the people we were inviting were spread out all over the country, and that it was a destination wedding on an island that we were not going to have a very high acceptance list. Hopefully enough people would be able to come to fill our 75 person payment to the venue! But we were doing what all the wedding websites say not to do: don’t invite more people than you can actually have!

So we crossed our fingers and hoped that the perfect number of people would come. Not too many that there wouldn’t be space, and not to few so we would be paying for unused meals!

How did you decide on your guest list? Was it tough? How many people did you invite compared to who actually attended?
How to Decide on Invitation Wording While Honoring Two Cultures?

After pinpointing down what type of style we wanted, we needed to think about what the invitation would actually say. I knew this might be a big deal from the very, very beginning. Frankly, the issue was how do we incorporate both American and Filipino traditions into an invitation that is “us.”

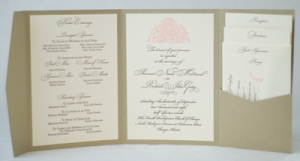
Filipino Wedding Invitation with Entourage Listed, image from Weddingbee

Since the beginning of the engagement, Mr. Pashmina’s mom has had one main question: Who are going to be our sponsors. Sponsors are individuals involved in your lives that will stand up and attest that you two should get married, meaning that you have the support of your friends, family, and the community. Basically saying, as elders, “we support this union.” Typically for a Filipino wedding this information goes on the wedding invitation, in the program, and is incorporated into the ceremony by the sponsor’s participation in the wedding. The list of sponsor can be pretty long. From what I understand, there are typically at least two Principle Sponsors and three Secondary Sponsors.

Mr. Pashmina’s mom was primarily concerned with the sponsors but really the entire entourage is listed on the invitation. I think she was so interested in the sponsors because it is such an elevated position, and it could be pretty much anyone friends or family. I loved that fact that you are acknowledging the entire community of people that support and will participate in the ceremony in such a public way. What a cool thing that can bind people together!

Roughly, this is how honored people get listed on a Filipino invitation:

Wedding Entourage

Principal Sponsors

‘to stand as principal witnesses to our exchange of vows’

_____&______

‘to assist us in out needs’

Bestmen ___

Maid of Honor ____

Groomsmen ____

(and the rest of wedding party)

(on the next page)

Secondary Sponsors

‘to light the way’ (will help with candle in ceremony)

____&_____

‘to clothe us as one’ (will help with veil in ceremony)

_____&_____

‘to bind us together’ (will help with cord in ceremony)

____&_____
Memory Sponsors

____

(deceased loved ones or those who cannot attend)

But from the get-go I was hesitant about going with a Filipino wedding invitation because it was so long, and I didn’t think my family would understand who sponsors were unless I explained. But I felt very, very guilty about not being excited about incorporating this tradition into our wedding. How fun would it be for all the people to open the invitation and see their name there in print. Who doesn’t like that! And I could easily explain all the sponsors to my family and friends. Maybe not to everyone, but they would still get the jest of it with who is getting married, time, location, etc.

But really, to put it more honestly, both Mr. Pashmina and I really like the modern, non-religious, American wedding invitation wording. This was our main constraint, and what we felt were holding our hands back.

These are our favorite wedding invitation phrases:

“Mr. & Mrs. X
and
Mr. & Mrs. Z
request the pleasure of your company
at the marriage of their children”

“With a joyous heart we request
the pleasure of your company
at the marriage of
X
and
Z”

“The X Family
and
The Z Family
request the pleasure of your company
at the marriage of their children”
“The X Family & Z Family
joyfully invite you to the marriage of”

“Together with their families
X
and
Z
request the pleasure of your company
at their marriage”

We both like how short and simple these were. We could then list the time, date, and location and leave it at that. We also like how it incorporated joy, excitement and warmth in the call for marriage, something that we felt sometimes lacked in more formal, traditional invitations.

But is it too nuclear/American just to mention his family/my family on the invite? This is what we grappled with. Should we have one of these American phrases as the first page of the wedding invitation and then have the second page with the wedding entourage on it? Or could this info go onto the wedding program where I could explain the candle, veil, and cord customs; the tradition of sponsors in Filipino weddings; etc. It might be really nice there, I thought.

So that is what we decided.

We were going to have a modern, American wedding invitation because it felt right for us. It was going to be a deviation from Mr. P’s parent’s tradition. We crossed our fingers and hoped that we wouldn’t be insulting anyone. I explained to Mr. Pashmina’s parents that we still were going to have sponsors and they would be listed in the wedding program along with the other people in the bridal entourage.

In the end this is how our cultural balance ended out. We could have done a dual wedding invitation with one side in Tagalog with traditional elements and the other side of the invite in English in the modern, American style. Or the first part announcing the marriage in the American style and the second page with the entourage in this Filipino style. Perhaps this is to our strong sense of individuality ingrained in us, dear America, but we went with what we felt was “us.”

How did you navigate cultural traditions in your wedding? Did you opt for American tradition over your parents’ cultural tradition? Did you have culture-neglect guilt?

Drawing Up Catalina Island Invitation Ideas

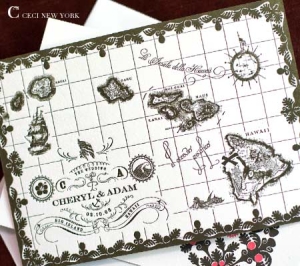
My #1 Invite. Image from Ceci New York.

One of my favorite parts of wedding planning has been looking at invitations online and in-person. I love, love, love invitations! You can go so many different ways and instantly give the opener an idea of what your wedding will be like. After coming across an article in Real Simple Magazine titled, “What is Your Invitation Style,” I decided to show Mr. Pashmina the pictures of the invites (without telling him what style was which) to see what he would like our style to be. According to the magazine there are four different styles: formal (traditional/sophisticated), semi-formal (modern/classic), thematic (reflecting a location or activity), and whimsical (quirky/creative). He couldn’t decided between two: thematic and whimsical. His reasoning for the two he chose: because they looked “fun” and “we are fun people” (yep, that is my man!). For thematic invitations we brainstormed that it could be island themed with palm trees, maps and charts; or nautical with ropes and anchors; cross-country themed with New York to California emblems. For whimsical ideas we mostly talked about how we could mix fonts and use something like the loose, curly one in the picture.

Mr. P's #1 Invite (on right.) Image from RIFLE.

I was super lucky and knew from the get-go that my friend, and bridesmaid, would be able to help me create custom invites so I was pretty much free to come up with whatever I could imagine (how cool is this, right?!). Over the next few months whenever I came across an invitation I liked on the internet I added it to my folder titled “Invitation Ideas.” Then the time came to narrow down my favorites! I pretty much was in love with two companies that made invitations Rifle and Ceci New York (especially their Destination line). They were whimsical and thematic–perfect. I thought the best way to decide on our invitations was to draw a rough outline using these sites as inspiration but use our wording, our names, and our Catalina-inspired elements! Then we would really be able to imagine them, then we could send these to my friend and she could work something up with these things in mind.

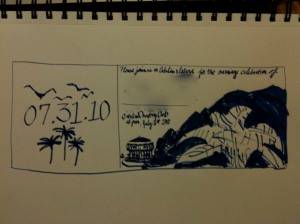
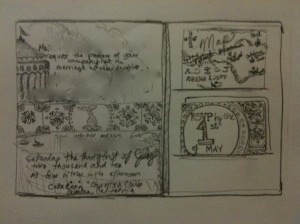
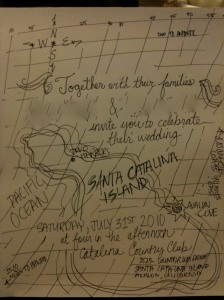
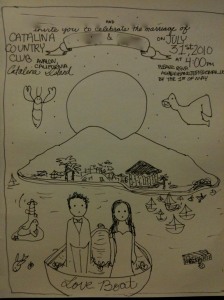
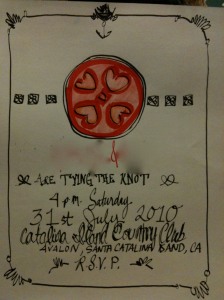
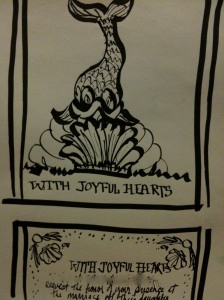
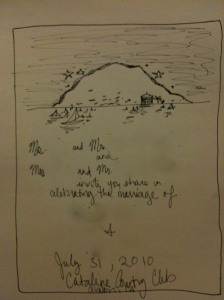
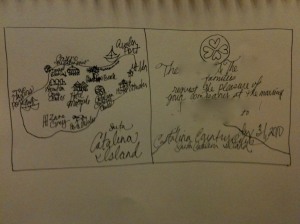
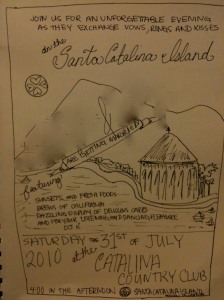
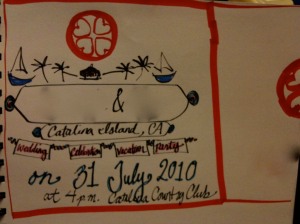
Here are a few of the ideas I came up with (I’ve blocked out personal info for privacy):

How did you decide on your invitations? Did you have a fun time researching and coming up with ideas like I did?

Our Venue: The Catalina Country Club

After all of this, I haven’t even introduced you to our venue! Let me bring you up to speed.

Image from Arcadia Weekly

After deciding on Catalina Island instead of a hometown wedding, we eagerly searched for a location. This took me months and months! Where…without visiting the island in person? I searched feverishly on the web. Googling, Flickring, and aimlessly searching photographer’s sites that contained images of other weddings on Catalina Island. Yep, I pretty much stalked Catalina Island trying to find out what locations were out there and what I would like best.

There was one thing guiding my search: I had my heart set on was that the ceremony was going to be outdoors. This is what I always imagined for myself. For the reception, I’d like it outdoors as well but that was slightly more open to what was out there.

There were two sites that had what I was looking for: Catalina Island Conservancy and Santa Catalina Island Company. From what I understand most of Catalina Island is actually administered by the Conservancy since it is protected land, while much of the city of Avalon was once owned by Wiley Rigley (yes, the chewing gum guy) and now his property is ran by The Santa Catalina Island Company. Hence, these two sites were the major players on the island.

Image from The Santa Catalina Island Company

The Conservancy offered 10 locations that consisted of beaches, gardens, and scenic bluffs. While The Company offered a Country Club, Beach Club, and a Ballroom. Mr. Pash wan’t that crazy about having a beach wedding since we had been to so many the year before. So that took away all the locations where you would need to stand on sand. My preference was either a garden or overlooking the ocean on the bluffs. So this is what I focused in on.

At first it seemed like the final contenders were going to be between the Summit Overlook and the Botanical Garden, both owned by The Conservancy. But then the Overlook would need a vehicle to transport people and all ceremony items rented, so it got canceled out after pricing and logistics got factored in to it. Then after talking to a coordinator about the Botanical Gardens that idea got canceled out. The Garden’s memorial building courtyard was a bit too small for 75 people and would be quite dusty that time of year.

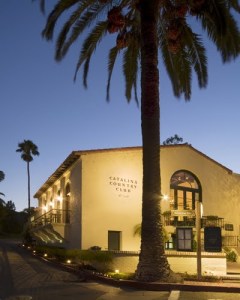
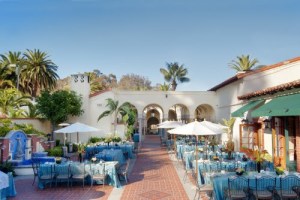
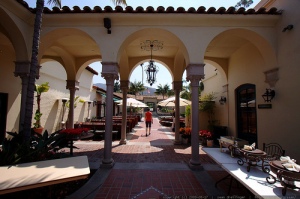
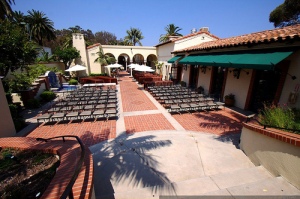
So after researching a bit more that left one place we both loved: The Catalina Country Club. It had an outdoor courtyard (yes!!) and beautiful, historic architecture (super yes!!). I had a vision of an vintage California wedding so it seemed like a perfect match for us!

Actually most of the Catalina Island was build in the 1920’s and The Country Club was part of this boom. In fact, it was built in 1921 as the Chicago Cubs’s spring training facility by Mr. Wrigley–the Cubs’s owner. Now the place has been turned into a country club/restaurant.

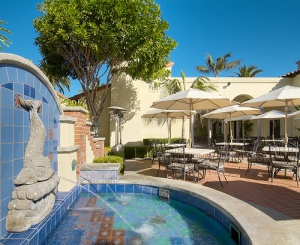
Here are a few pics of the place. I absolutely love the Mediterranean feel of The Club. The red tile roofs, the heavy wooden doors, the white washed archways, and the black wrought iron lights. All of this combined with my most favorite element: the colorful tilework on the floor and in the fountain. These tiles were created in Catalina Island due to Wrigley’s building projects. The tiles are glazed in the most beautiful colors and depict amazing geometric designs and also pictures of native animals and oceanlife, not just at The Country Club but throughout the island.

*all images from The Santa Catalina Island Company or Panoramio.com


Finding My Dress

Image from MichelleBrusegaard on Etsy

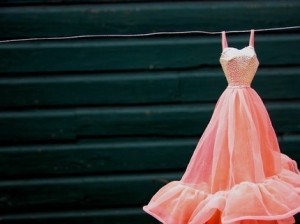
When everyone kept asking me what type of dress I had in mind for my wedding I kept on thinking about my favorite Barbie doll when I was a child. I didn’t tell anyone at the time but that is my little truth! It was the 1985 Peaches & Cream edition–yes, I’ve done my research for this post–you know, the one with the ruffly peach ball gown and the strapless opal bodice (well it was only strapless because my straps wore off after too much play). She was the epitome of beauty. She was Hollywood glamour before I even realized it! I loved the way the colors in her skirt changed colors with the layers of peaches and pink chiffons (or whatever light fabric it was). I even thought about having a wedding dress made so it could be similar. But quickly in that next moment I knew I wasn’t that much of a fanatic! With my luck it would probably look more beauty queen than Veronica Lake.

From fashioncookiejar.com

So while I wait for our professional photographs to come in I wanted to tell you about the journey (okay, long journey) finding my dress. I know I was always searching to see real women (not models in ads) in the gowns I coveted.  So hopefully this will help some of you as you find yours.

I had two requirements for my dress: I had to feel beautiful in it and it couldn’t cost more than $1500. So in the coming posts I am going to show you pictures from my outings to Saja and Jenny Yoo (both boutique-y alternatives to fluffy gowns), The Wedding Garden (an upscale thrift store with big designer names), and J-Crew (and I’ve already posted about Oleg Cassini at Dillard’s and David’s Bridal). To finally decide on Maggie Sottero and then ultimately Allure at RK Bridal (a no-frills shop with thousands of dresses that you choose yourself). So get ready for bad pictures!!

Did you have hidden inspiration behind your gown selection? Did you visit a number of stores before you found the one?

Making Our Ring Pillow

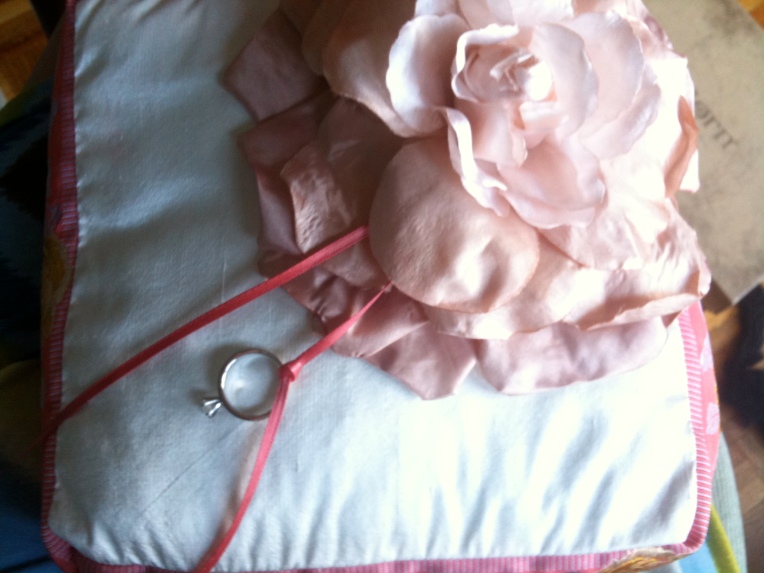
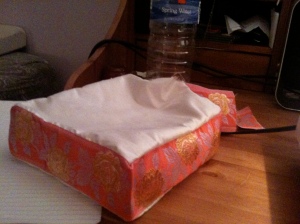
Finished pillow - view from above with my engagement ring. * Personal photo.

I finished our ring pillow three days before the wedding! It was in limbo for a few weeks because I didn’t know what I wanted to decorate the top of it with (this is the most important part, right?).

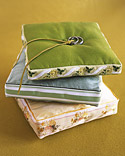
Image from Martha Stewart.

Originally I decided to make a ring pillow myself because I thought I could save money. FYI: this isn’t the case. There is a reason they sell the decorated ones for $50-$60 on Etsy. I really liked the ones by 5eizen with their oversized blooms but I couldn’t bring myself to pay so much (little did I know I would spend this much making one. But this is the thing: I used the most lavish and inexpensive details that I could. Well, almost. I’m a sucker!!)

After paying $5.00 for 1/2 a yard of duponi silk, $25 for a yard of floral ribbon, $5 for a oversized bloom, $5 for an unused starfish button it all added up. I had on hand the thread and ribbons so those didn’t cost anything, thank goodness. So if you are gonna save money, go with a calico print, polyester ribbon, use what you have in the closet. If you don’t, or fall into the “Oh my gosh, I love that one!” you really won’t save a dime. Here is a quick tutorial on how to create it:

Square Ribbon Ring Pillow (based on Martha Stewart’s Ribbon Ring Pillow)

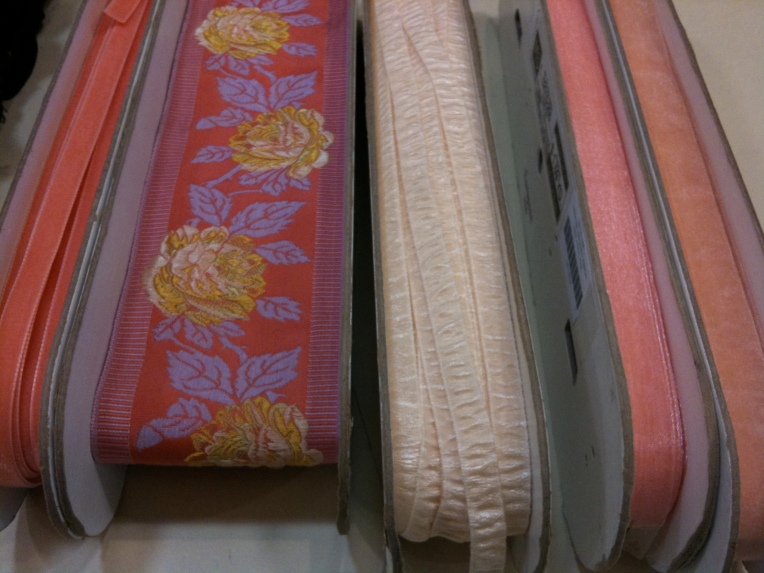
1. Think about what type of feel you want for your pillow. There is a lot of options for ribbons and fabrics so have something in mind before you go out. I really wanted to tie in the range of pinks and peaches we were using for our bridesmaid dresses.

The ribbon I decided on is the big, flowery one that is second from the left.

2. Cut out two 7 1/4-inch squares of fabric. (Any fabric type will work–I used silk duponi)

3. Cut the piece of ribbon 31″ long. (I used a very wide ribbon, but this isn’t a much. I wouldn’t use anything less than an 1″ just because it acts as a side of the pillow and needs to be substantial.)

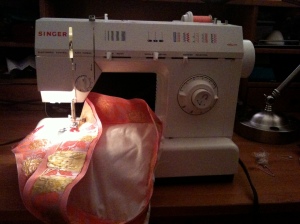
4. With right sides facing each other pin one edge of the ribbon to the edge of one square–beginning at the middle of the fabric square–and sew.

5. Repeat step 4.  The trickiest part will be making the two ribbons meet perfectly–mine didn’t as hard as I tried. To do this, make sure that the ribbon is evenly pinned with what you just sewed in Step 4. (If there are any prints in the ribbon make sure that they are not stretch out more on one side).

6. There will be a gap in the pillow where the two ends of the ribbon meet. Turn pillow right side out through this hole.

*Personal photo.

7. Fill with stuffing (I added some dried flowers I had that Mr. P gave me on our first date–sort of like giving a Build-a-Bear a heart when you are stuffing it. Okay I am a total dork!).

8. Pin the ribbon edges together by turning them into to each other (so the raw edges are hidden). Hand-stitch the opening closed with as close a thread color as possible.

9. To finish it off there are a number of different options:
-I initially bought a decorative button thinking I was going to make a tuft on the pillow like the Martha Stewart’s. If you want a tuft you can use a decorative button or a covered button. A low budget option would be to make a covered button–it won’t show much from the aisle but will look super cute. To do this cover a regular button with a piece of fabric from the same bolt that you used to make the pillow. Use a glue gun to secure the fabric to cover a regular button. To make the tuft, add the button to center of the pillow. Stitch it all the way through (all from the top fabric, through the stuffing to the bottom piece of fabric) to create an indent, or a “tuft.”

*Personal photo.

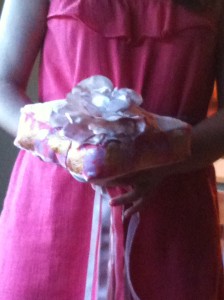
-I ultimately used a flower to decorate the top. My tip is to find a flower that already has a pin closure attached to it. I was intimidated by removing the flower head from its stem and then securing it to the pillow top. (Just because I did this for another project and the flower’s plastic bottom made it stand up a little more than I liked and you could see the plastic. It sorta was like a heavy top and a little ugly.) The H&M flower was exactly what I wanted too. It had the perfect color I was looking for to tone down the bright colors of the ribbon, it had long petals, and it was a cool silk like texture. It was made to be a broach or clothing accessory so it had a pin and a clasp already attached.

10. Cut a thin piece of ribbon about 14″ long. Tie the thin ribbon around button or stitch it into the petals of the flower.

11. Tie the rings on ribbon and modify the length. (Make sure to think about how you will fasten the rings during the wedding. You don’t want them to fall off when the ringbearer is walking down the aisle and you don’t want your best man to wrestle with it during the ceremony!)

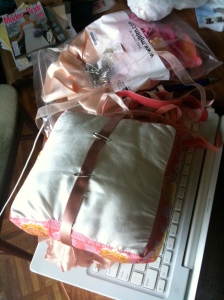
The bottom of the pillow. *Personal photo.

12. (Optional) I secured a bunch of different types of ribbons to the bottom of the pillow. I had a bunch around and thought that it brought in some of the other colors we were using (and that it added a little pizzazz!) Secure a 5″ piece of ribbon to the bottom of the pillow with safety pins, allow for the width of your ringbearer’s hand, sew in place (this is how he will carry the pillow). Then place 14″ pieces or ribbon onto the middle of the handle, at their middle, sewing so them into place. Alternate additional colored ribbons.

So there you you have it!! It was pretty easy–well I would say medium difficulty because the last step of stitching the ribbon together closed threw me for a loop. (Yes, I positioned the flower to somewhat cover the stitching because I wasn’t that happy with the closure.) But it was totally manageable!

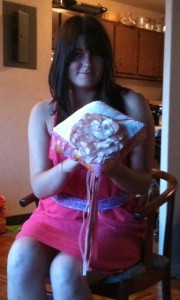
Demoing the pillow. *Personal photo.
*Personal photo.

Today I am in the Sky! Marriage Bound

(I wrote this post on July 27th–the night before I was going to leave for the wedding. I thought I was going to post it to the hive the day I left. But with so much to do I guess I forgot to do that part! Anyways I thought you might like to read how frazzled I was!!! So here it is….)

I am a mess you Bees! My apartment is a disaster. I already left one of my bridesmaid gowns at work (it was delivered there by the tailor but I forgot to bring it home. Thankfully my co-worker was thinking and called me). But by the time you read this I am going to be up in the sky somewhere between New Jersey and California. It is 10 p.m. the night before we leave. At this moment my fiance is doing laundry, I am printing out the Menu cards, and I am freaking out about leaving my cat for twelve whole days. I didn’t think there were so many things still to do last minute but then this month totally snuck by me. July has been crazy!

Image from US Weekly

Fourth of July weekend, then the Bachelorette Party in Vegas the next weekend, then The Bridal Shower the weekend after (more on this later). And then it was THIS weekend. Wedding weekend! Boom, boom, boom. Who knew I was gonna be so busy.

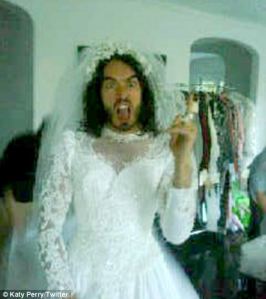
Saturday is the big day! And I am going to leave the comfort of my own home where there is crafting supplies, my computer files, my temperpedic bed. Just a few more hours till we leave. Can I complete all the things that MUST get done? Will I sleep tonight. OMG! I feel like that how Russell Brand looked in that photo that Katy Perry Tweeted. I think the caption was “Bridezilla much?”

So wish us luck these next hours!

15 Months of Planning = A Big Relief!

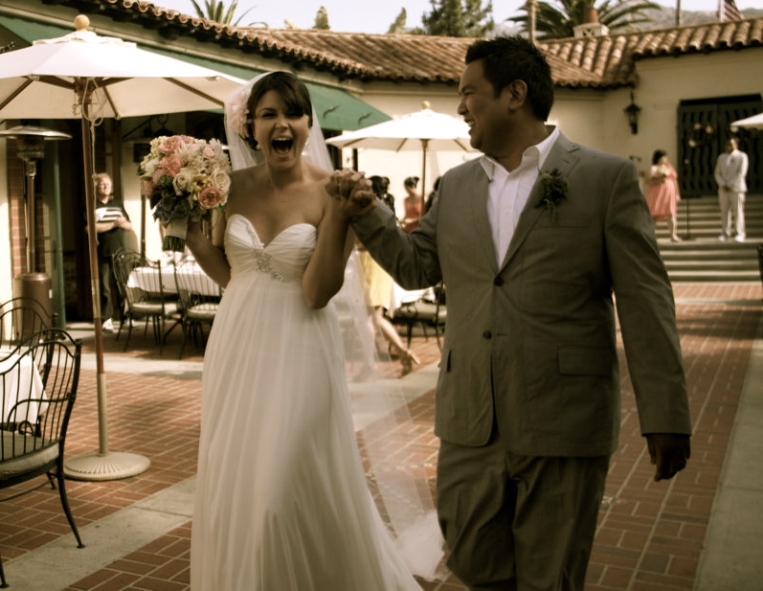
Photography by Marion Jameson

Getting married is a lot of work! It takes months of research, hours of planning, perhaps a few fights, and the coordination of so many people. So when it finally happens it is like bursting a piece of bubble wrap–it is awesome and so rewarding!! I can’t wait for all of you to experience it!!! Ours was the perfect celebration! But it wasn’t perfect because nothing went wrong. Oh no, we had our issues. But I didn’t let those parts interfere. It was perfect because in its entirety it succeeded my expectations. And that is a very nice feeling!

The most unexpected greatness…it was fun! Really, why did I not realize how fun it would be? I guess because I was so obsessed for 15 months of my life planning it. I almost didn’t even try to picture how the experience of it would be. I guess I didn’t want to get my hopes up or have a vision that wouldn’t match the real thing. I am so glad I stopped all that Type A personality stuff!! Once I got to the island I just let things be as there were. So this is my hope for you too. Don’t worry so much or freak out about things. Have fun!! Revel in its specialness.

And ours did feel so very special! I literally felt the energy of all of us coming together on magical island. It was everything I love about weddings and nothing I’ve always hated about them. But I guess that is part of it…it felt so very, very us! My husband says it was “quaint, romantic, and intimate.” And it was! A dinner party with dancing for 65 of our closest loved ones, a mediterranean courtyard filled with aromatic herbs, and the warm Californian sun shining down on us–two people madly in love! It was wonderful! (Can you tell I still have the glow of a newlywed!)

So let the recaps begin!! I can’t wait to tell you about the events leading up to the wedding and some of the details I didn’t get a chance to tell you about before.

A Bohemian Wedding in Oregon

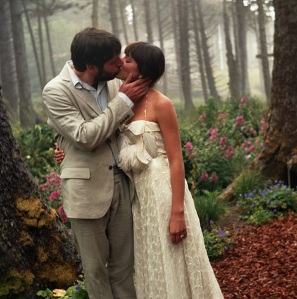
Image from Once Wed.

One of my purposes in creating this blog is to helpfully arrange bohemian-style weddings. So it is great when, in my everyday Internet searching, I find a real wedding that fits the bill.

This wedding in Portland, Oregon is so spot on it is wonderful. The perfect mixture of casual simplicity with eclectic elegance. I love the feathered necklace and earrings with the texture & airy dress. The setting is straight out of a nymph fairytale with the coastal fog rolling in, the wildflowers in full bloom and love in the air.

For more images stop by the sites Frolic or Once Wed.